

In this part of the process, I was working turning my planning and designs into a real manufactured product. This allowed me to critically asses my work, and I was able to learn more about the obstacles facing designs and manufacturers, and how to work around them. Below are the photos of my realization process.
These two pages are my production plans.


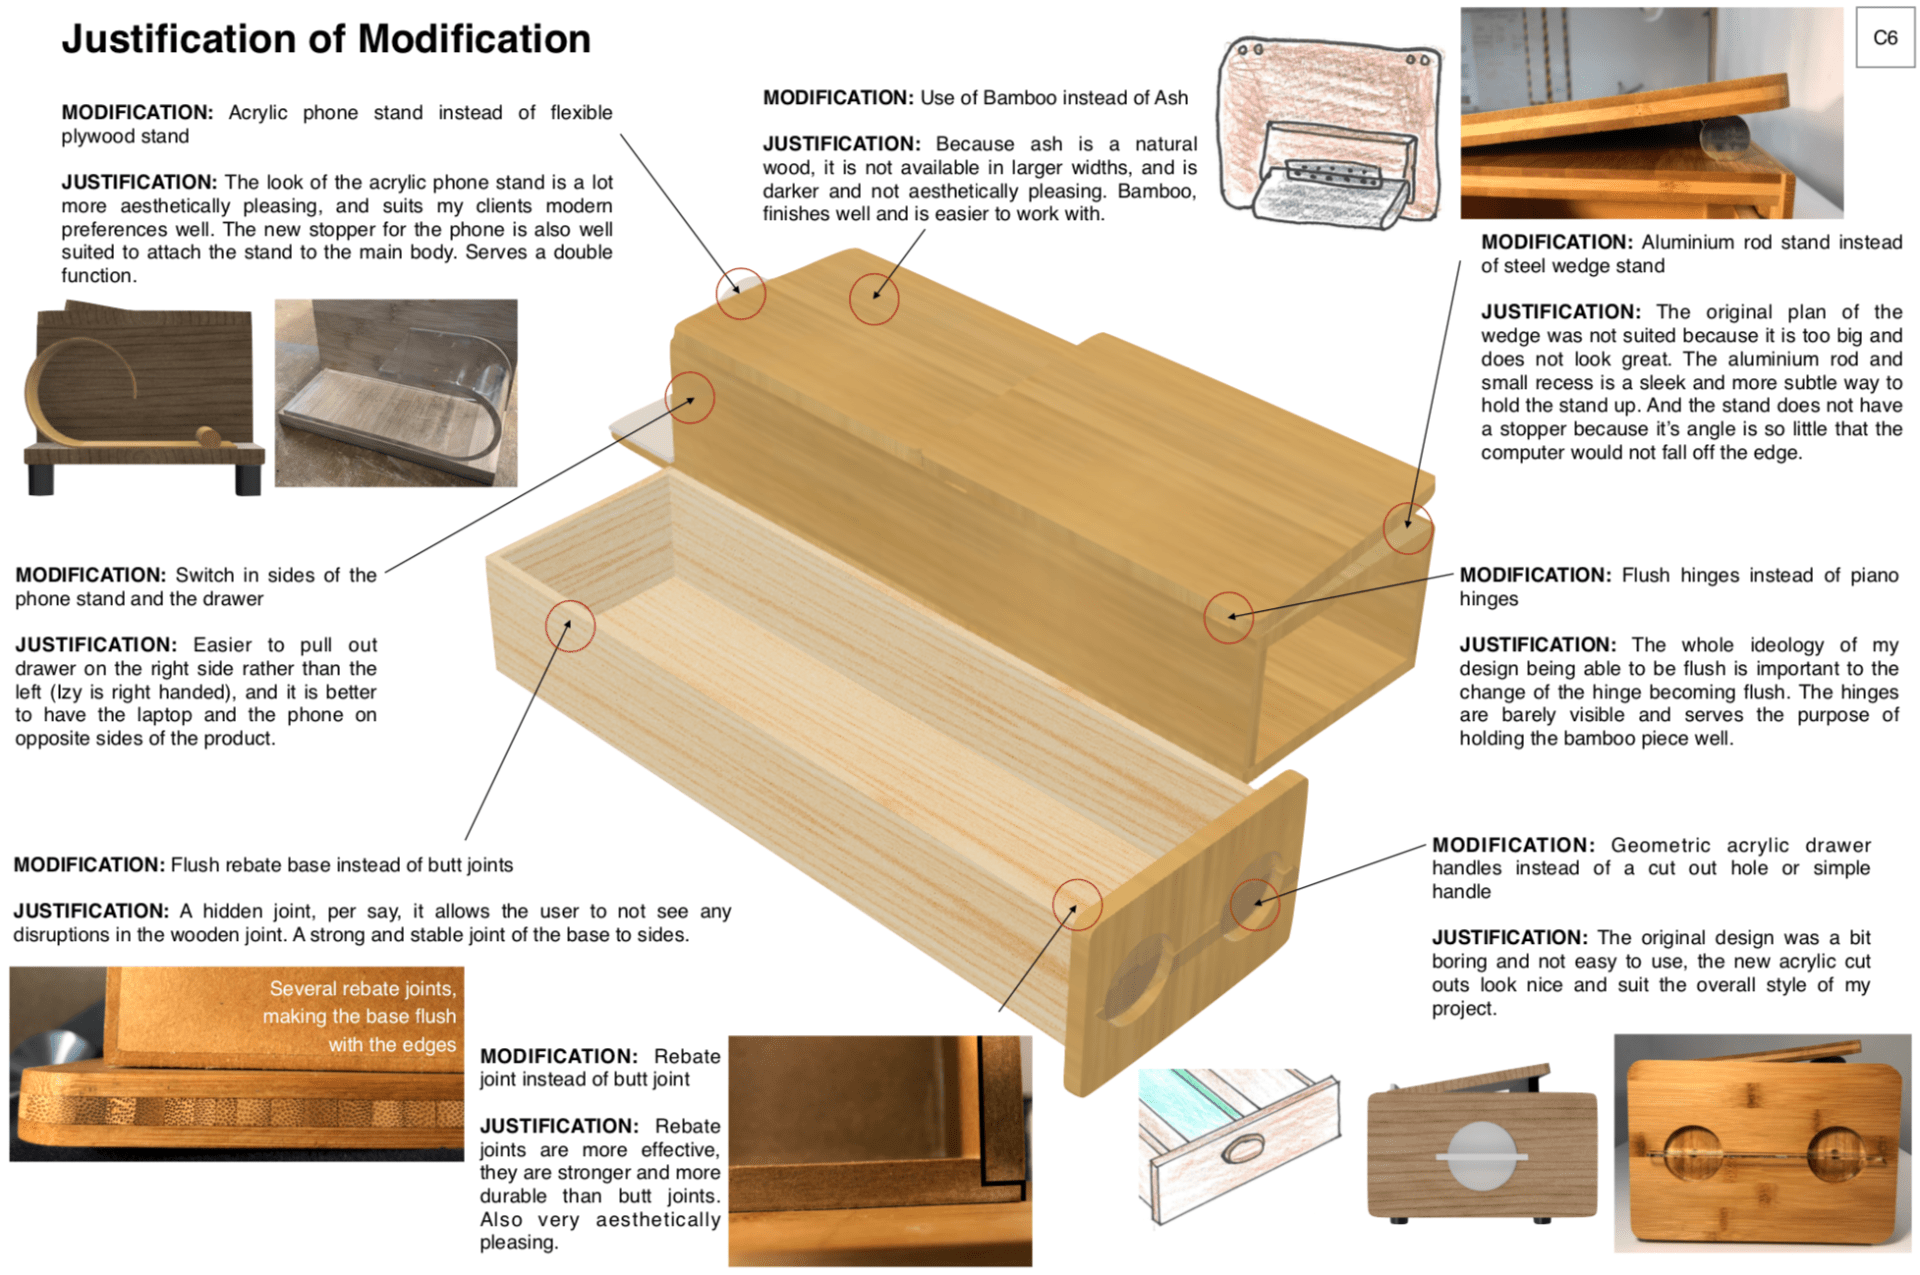
Here are photos of my final product.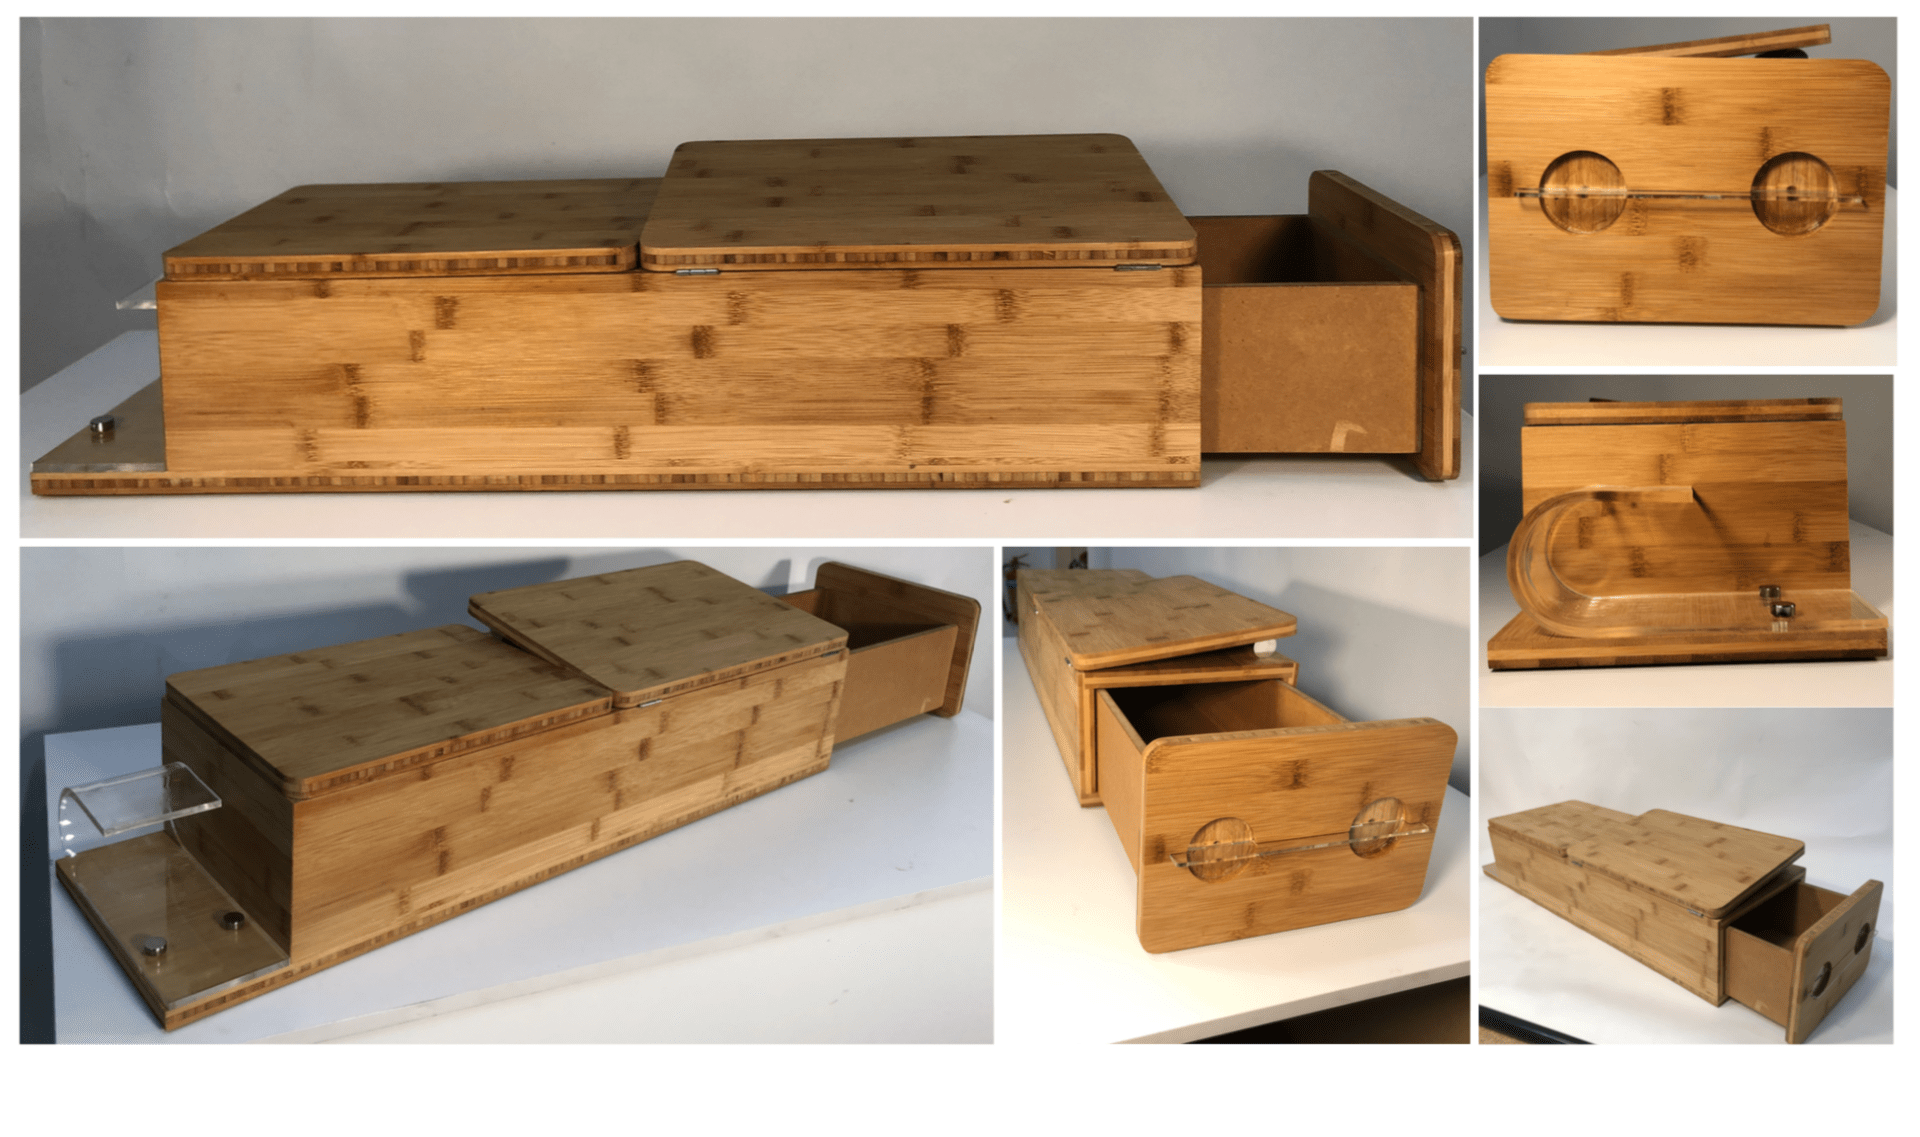 I realized that I ended up changing some aspects of my design, here are the justifications.
Here is what my product looked like in it’s intended environment

This was a really interesting post to read! Your coursework looks very organised and appealing to read. During my project, I found it difficult when transferring the organic shape of my housing to the Adobe Illustrator for CNC Milling given that some of the measurements were vague. However, you had a good idea in using a large-diameter aluminium rod to curve the acrylic sheet as per your wish.
Also, I noticed that you used a thin aluminium rod to create the lift in the laptop stand, but I was wondering if you considered making it adjustable based on the physique of the user?
Thank you! So originally I was planning on having the laptop stand to be adjustable. However, while I was producing my design, I came across some difficulties and had to make adjustments accordingly. Ultimately, I decided on using an aluminum rod because I found the angle to be just right so it doesn’t require and stopper, sleek, and able to be removed so the top can be flush.